threelilprincesses.com

Tag: how to

  • {TUTORIAL}: Homemade Lego man costume for under $15

    {TUTORIAL}: Homemade Lego man costume for under $15

    By Sheralee White

    As part of Book Week in August, we put together a homemade Lego man costume for my six-year-old son. It took a few days to make but certainly wasn’t difficult at all.

    With Halloween next week, I thought it was the perfect time to share how we made it for anyone looking for kids costume ideas.

    Things you’ll need:

    •  Cardboard box large enough to fit your child
    •  4 small round takeaway containers (or small cat/dog food tin)
    •  A hot glue gun with 3-4 glue sticks (these can be purchased from discount shops for about $7)
    •  Pencil
    •  Flour
    •  Water
    •  Salt
    •  Newspaper
    •  Plain white paper
    •  1 can of spray paint

    Timeframe:

    2-3 days to make

    STEP 1

    Remove the flaps on the open box. On the opposite end, cut out a hole, large enough to fit your child’s head through. Cut smaller holes on each side to fit your child’s arms through.
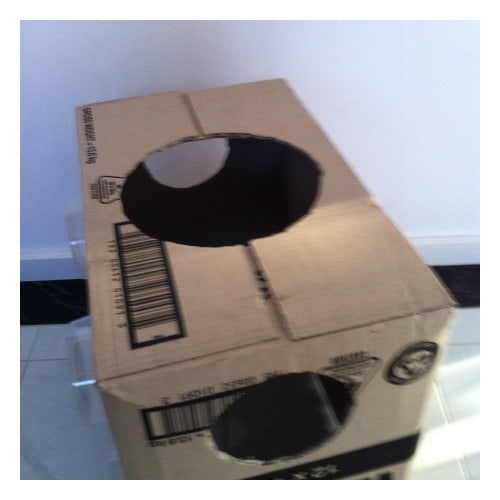
    pic

    STEP 2

    One at a time, place the containers on the front of the box and use them to trace a circle using a pencil. Remove the container and follow the pencil outline with the glue gun. Stick the container, edge down, onto the glue. Repeat for each container.
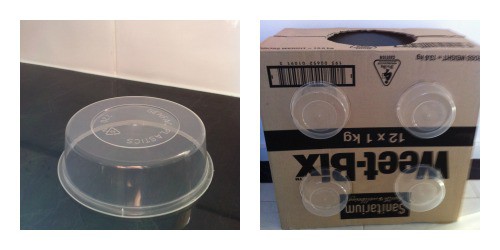
    pic2.3

    STEP 3

    Now you need to make the paper mache, Mix one part flour with one part water (about 1 cup flour and 1 cup water is enough) until you get a thick glue-like consistency. Add a bit more water if it’s too thick.

    Mix well with a spoon to get rid of all the bumps. Add a few tablespoons of salt to help prevent mould.

    • You need to use strips of newspaper only.
    • Let the newspaper strips soak in the paper mache glue a little before using.
    • Cover your artwork with only 2-3 layers, then let dry completely. This is an important step.
    • Once a layer is dry you can add 2-3 more layers, remembering to let each layer dry before adding the next one.
    • The final layer can be plain paper – so it’s easier to paint – but use the thinnest paper possible and make sure it’s soaked well in the paper mache glue.
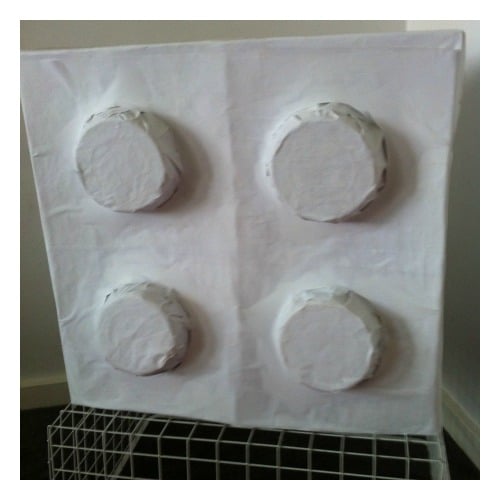
    pic4

    STEP 4

    Using the pencil, write the words Lego on each raised container, then with the hot glue gun follow over the words so that the word is raised in glue.
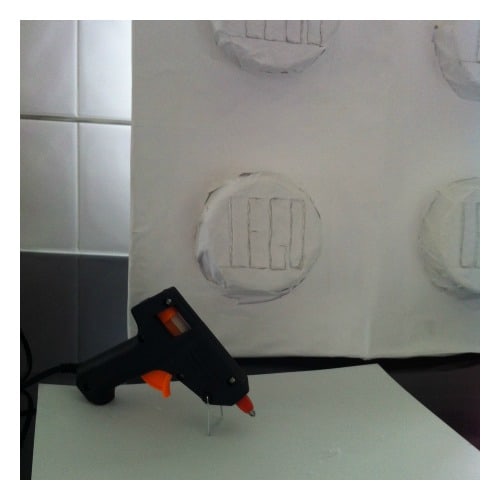
    pic5


    STEP 5

    You’re ready to paint your block in your favourite Lego block colour.
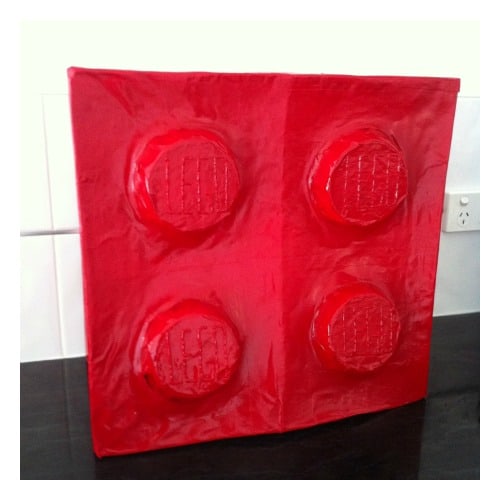
    pic6

    STEP 6

    Grab your child and start having some fun.

    What have you made recently with boxes?
  • {TUTORIAL}: How to make Wizard of Oz birthday boxes

    {TUTORIAL}: How to make Wizard of Oz birthday boxes

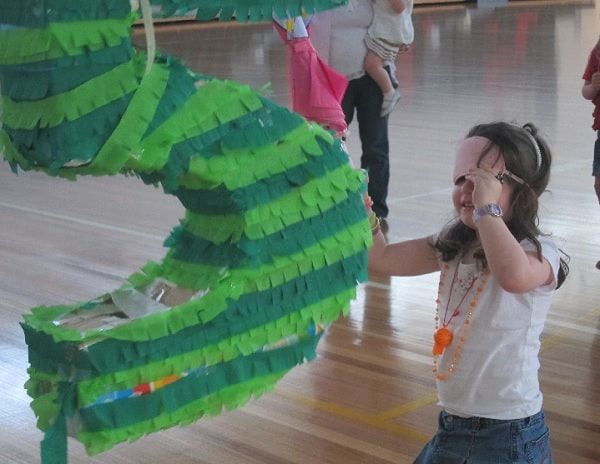
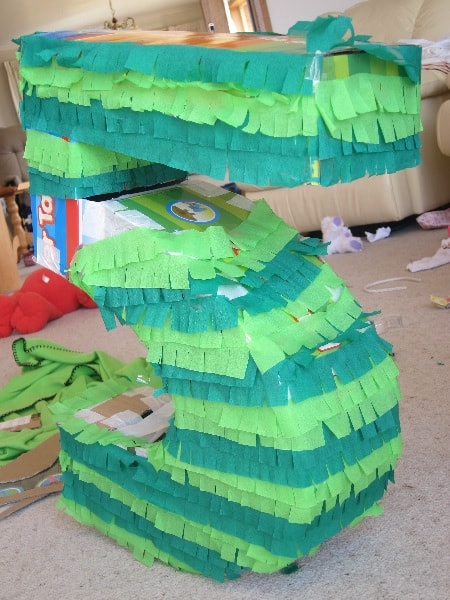
    When Ella had her Wizard of Oz birthday party last year, one of the things that got the most comments – other than the rainbow house cake and that stellar *cough* homemade number five piñata, was the take home boxes (or party favour boxes, as the Americans would call them).

    Originally, I was just going to get a copy of the Wizard of Oz book for every child, knowing most of them have probably never read the book or watched the movie. Unfortunately, I ran out of time to order copies and went for the tried and true take-home party box.

    After getting over the shock of how expensive party boxes are – ridiculous, I tell you – I decided that, being the super crafty mum that I am *cough*, I should just make my own.

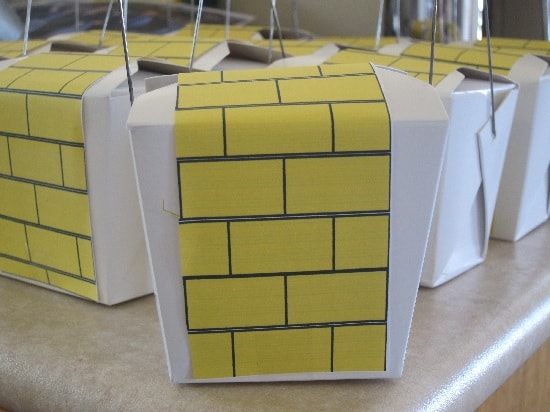
    Here’s the end result:

    Wizard of oz birthday boxes 1
    What do you think?

    They were so super easy to make. Here’s how we did it.

    STEP 1:

    Buy some noodle boxes from a $2 shop. You should be able to buy about a 10 or 20-pack of boxes for $2.

    STEP 2:

    Wizard of oz birthday boxes 2

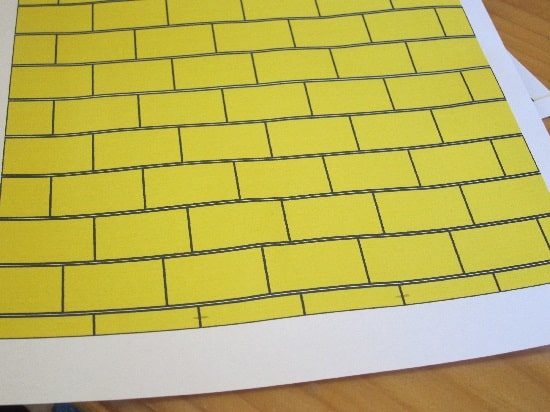
    Create a yellow brick pattern in Word or Powerpoint. Then print out. To save you the hassle of having to create all those bricks, you can download our bricks here. Prepare to use a bit of yellow ink.

    STEP 3:

    http://www.mediafire.com/?b6pcs6m71ctmmyy


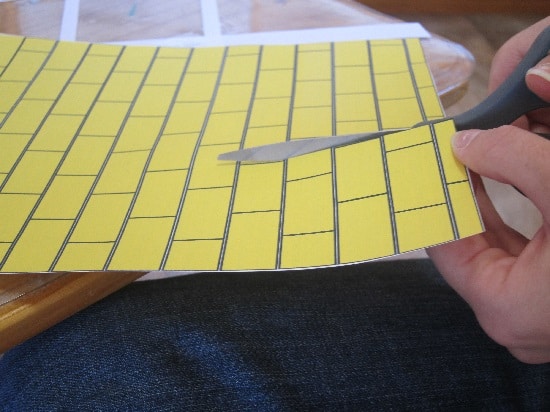
    Cut the brick pattern into a long strip, following the brick lines to keep it straight.

    STEP 4:

    Fill the noodle box full of treats. We had a combination of small toys and lollies. We were a bit light on with the lollies, just because I don’t think kids need a lot.

    STEP 5:

    Wizard of oz birthday boxes 4

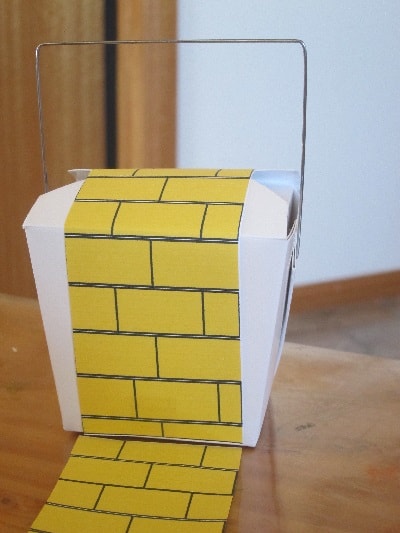
    Close the lid of the noodle boxes. Wrap the brick strip around each box, taping it at the bottom.
    Ta da! That’s it. Too easy. You could adapt this for plenty of different themed parties.
    What do you usually do for birthday party take-home gifts?

  • How to get rid of the pacifier – once and for all

    How to get rid of the pacifier – once and for all

    getting rid of pacifier

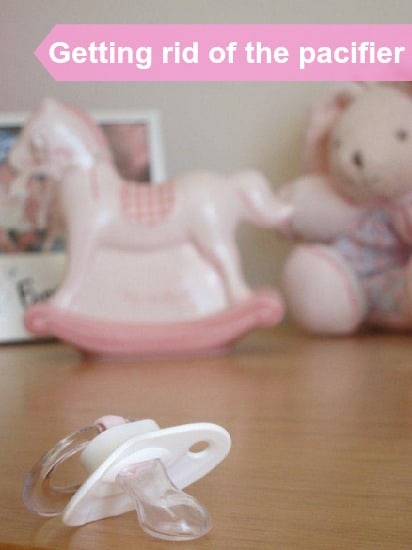
    Getting rid of the pacifier has been on our to-do list with Holly for the last few months. Finally, on Friday night, we did it.

    After talking about it on Instagram and Facebook on the weekend, I thought I’d reveal exactly how we went about it for those about to go through the same process.

    Exactly when you get rid of the dummy is really up to you. Ella was two and a half when she lost hers and Holly has just reached the same age. Both girls weren’t allowed their dummy during the day – only for sleeps.

    Here’s what we did:

    Two to three months out:

    Tell your child the dummy fairy will come and take their dummies one night to give to a little baby who needs it more than they do. The girls felt like it was less about what they were losing and more about how they were able to help someone else. And a little baby to boot! Continue to tell them this story over a two- to three-month period.

    Two weeks out:

    Read some children’s books on getting rid of the dummy, pacifier or binky – whatever they call it. We didn’t do this, but had the added bonus of childcare actually reading a book on the topic during the past few weeks. I think this really helped Holly because the message wasn’t coming from us. (If anyone’s interested to know what it was called, let me know in the comments and I’ll find out for you).

    One week out:

    Take your child shopping and let them pick out something they’d really like to receive from the dummy fairy in exchange for their pacifier. Seeing what they’re getting makes it all the more real. Alternatively, you may want to keep the gift a surprise and let them guess in the lead up to the big night. We also began to get Holly talking to friends, family and child carers about how she was going to give her dummies to the little babies.

    The day of:

    Choose a day that’s not going to interrupt their schedule too much. We chose a Friday night, so if she didn’t sleep well she had the weekend to make up for lost sleep. Talk excitedly about the big event with your child and with others you run into it.

    The night of:

    Have your child put the pacifiers into a container at bedtime or late afternoon. We put together a little letter this time. We didn’t do that with Ella. We bundled that up with the dummies and sat it on the kitchen bench for easy access for the dummy fairy – super important, of course! When they go to bed that night, reiterate what they’ve done and how proud you are of them for helping the little babies.

    I’m not saying this is guaranteed to work for your child. Each child is different. For us, it’s worked both times and we’d happily do it again – if we had to. Thankfully, we don’t!

    I will add that Holly has sat up in bed reading to herself until 9pm the past three nights. That’s later than usual, but at least she wasn’t yelling out for dummies. In fact, she’s only mentioned the dummy once, which was the second night. We just went over the story of the dummy fairy and the babies and she was happy with that. She’s also slept through the night, without waking – which is the thing I was most worried about.

    If you’d like other ideas for getting rid of the pacifier, make sure to read Five super techniques for losing the pacifier.

    How did you get rid of the pacifier for your child? What worked and what didn’t?

  • How to make a piñata – number five piñata

    How to make a piñata – number five piñata

    Over the next few weeks I thought I’d share some birthday inspiration from the girls’ birthday parties. Today is how to make a piñata using a cardboard box and a loose piñata pattern for a number five pinata.

    Step 1:

    pinata

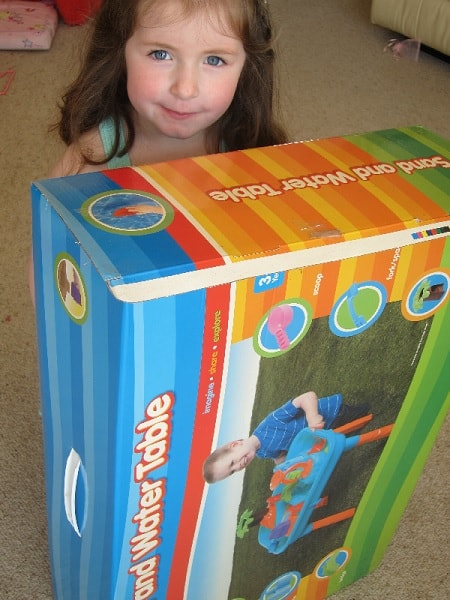
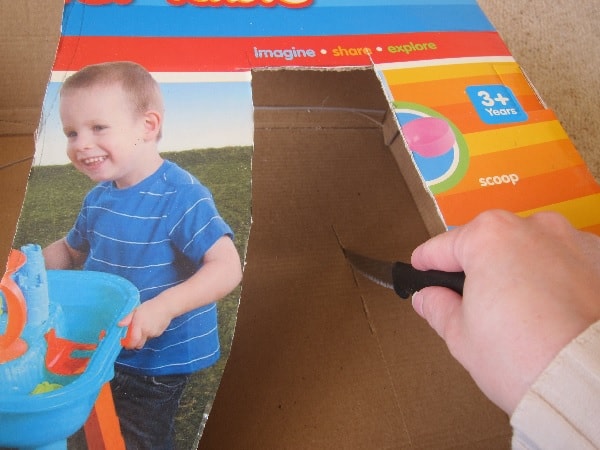
    Find a decent-sized box. Ours was a sand and water table box, because it was a rectangle shape. There’s no exact measurements here, so choose the size you like. I found for number five, it works best to have a rectangle rather than a square-shaped box.

    Step 2:

    pinata

    Draw on the front of the box the shape you wish to make. So for us, it was number five. Make sure the sides of your number five drawing go directly to the edges. You’ll see why in a minute.

    Step 3:

    pinata

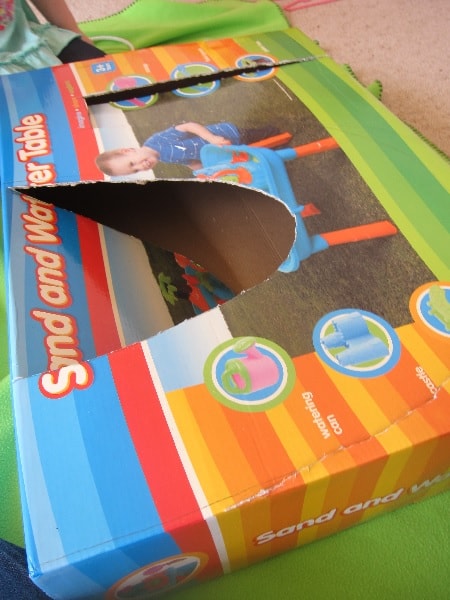
    Using a Stanley knife (or a kitchen knife in our case), start cutting the inside sections of the five – that is, the half circle at the bottom of the five and the straight and curved sections of the top. Do not cut along the length of the box at the sides, only across the width.

    Step 4:

    pinata

    I found it useful to then use the knife or a long pencil to trace through to the back of the box from the inside. Repeat the cutting steps.

    Step 5:

    pinata number 5

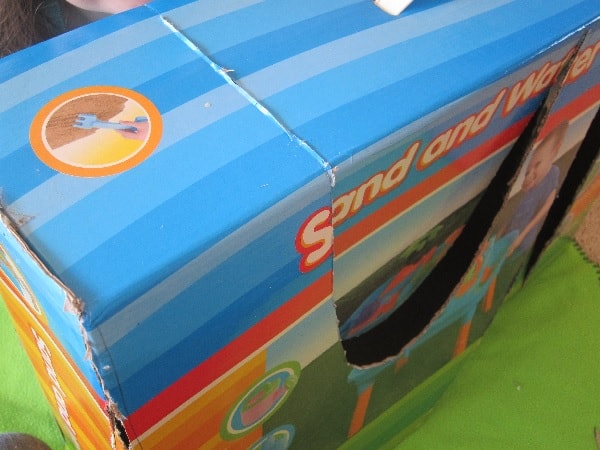
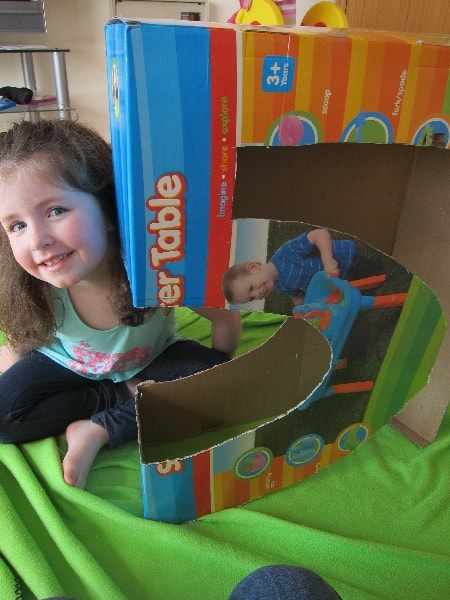
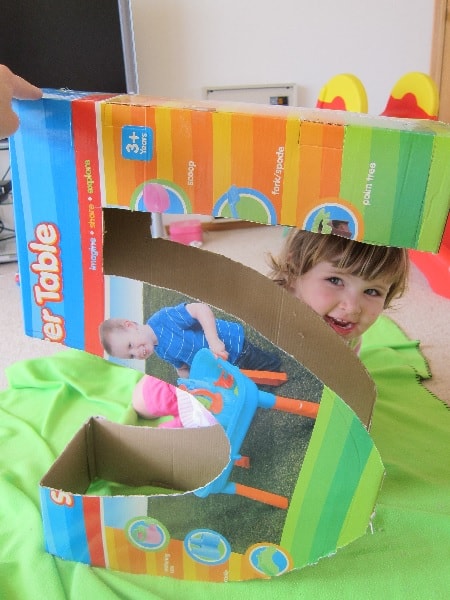
    On the half circle at the bottom, you should now have cut the front half circle, back half circle and across the width of the side of the box (as shown).

    Step 6:

    pinata number 5

    For the top, you should now have cut into the box from right to left, followed by a cut downward and then finally the curve shape. Do this for front and back, along with the right-hand length of the box (as shown – so much easier to see in pictures than to explain in words!)

    Step 7:

    pinata

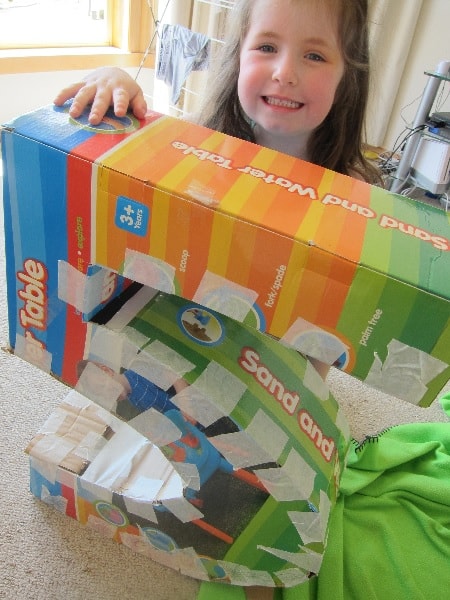
    Go through and measure strips to cover the exposed outer edges to enclose the pinata. Then use tape to stick the strips to the pinata. You should have plenty of cardboard leftover to do this.

    Step 8:

    pinata decorating

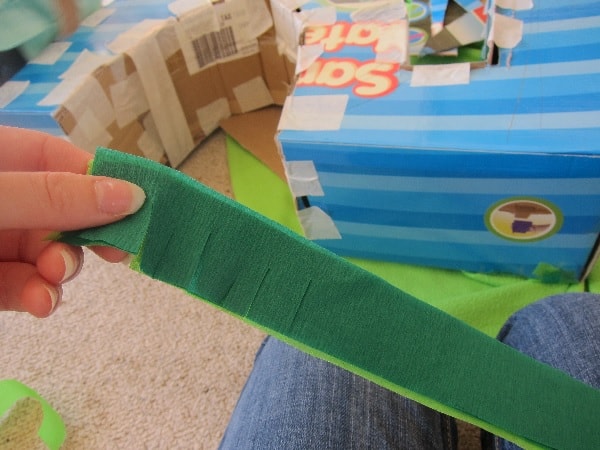
    Now to decorate. Take some streamers and slice three quarters of the way up the width of the streamer, being careful not to cut all the way through. These cuts can be about 1-2 centimetres apart. TIP: To make it easier, put a few layers of screamers together and cut a few streamers at once.

    Step 9:

    number 5 pinata

    Wrap the streamers around the number five cardboard cut out. You can alternate between colours or use one colour. It’s completely up to you.

    Step 10:

    number 5 pinata

    You’ll notice we left a few holes to allow us to put in treats for the kids.

    Find yourself a decent stick, the end of a broom or, in our case, an umbrella to use to bash it open at the party. It’s fairly durable, so it takes a bit to crack open, but then, that’s half the fun!

    What are your favourite birthday party games?

    Want more birthday inspiration? Try…

  • How to remove pen from leather lounge suite

    How to remove pen from leather lounge suite

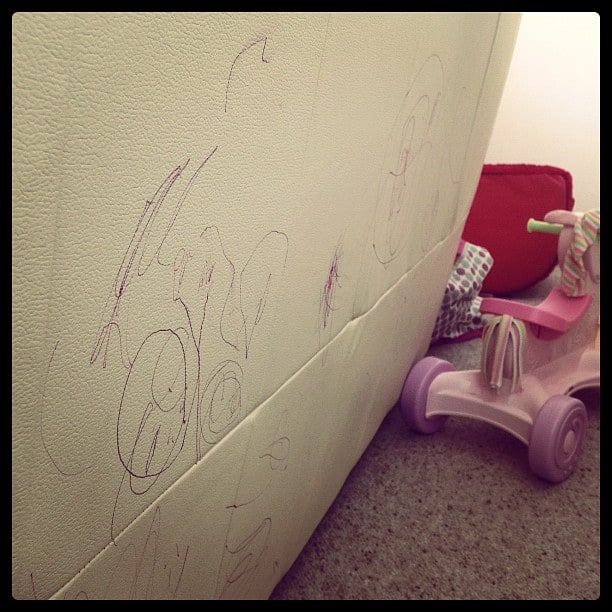
    Last night I posted this photo on Facebook of Texta all over our good leather lounge suite.

    How to get pen off a leather lounge suite

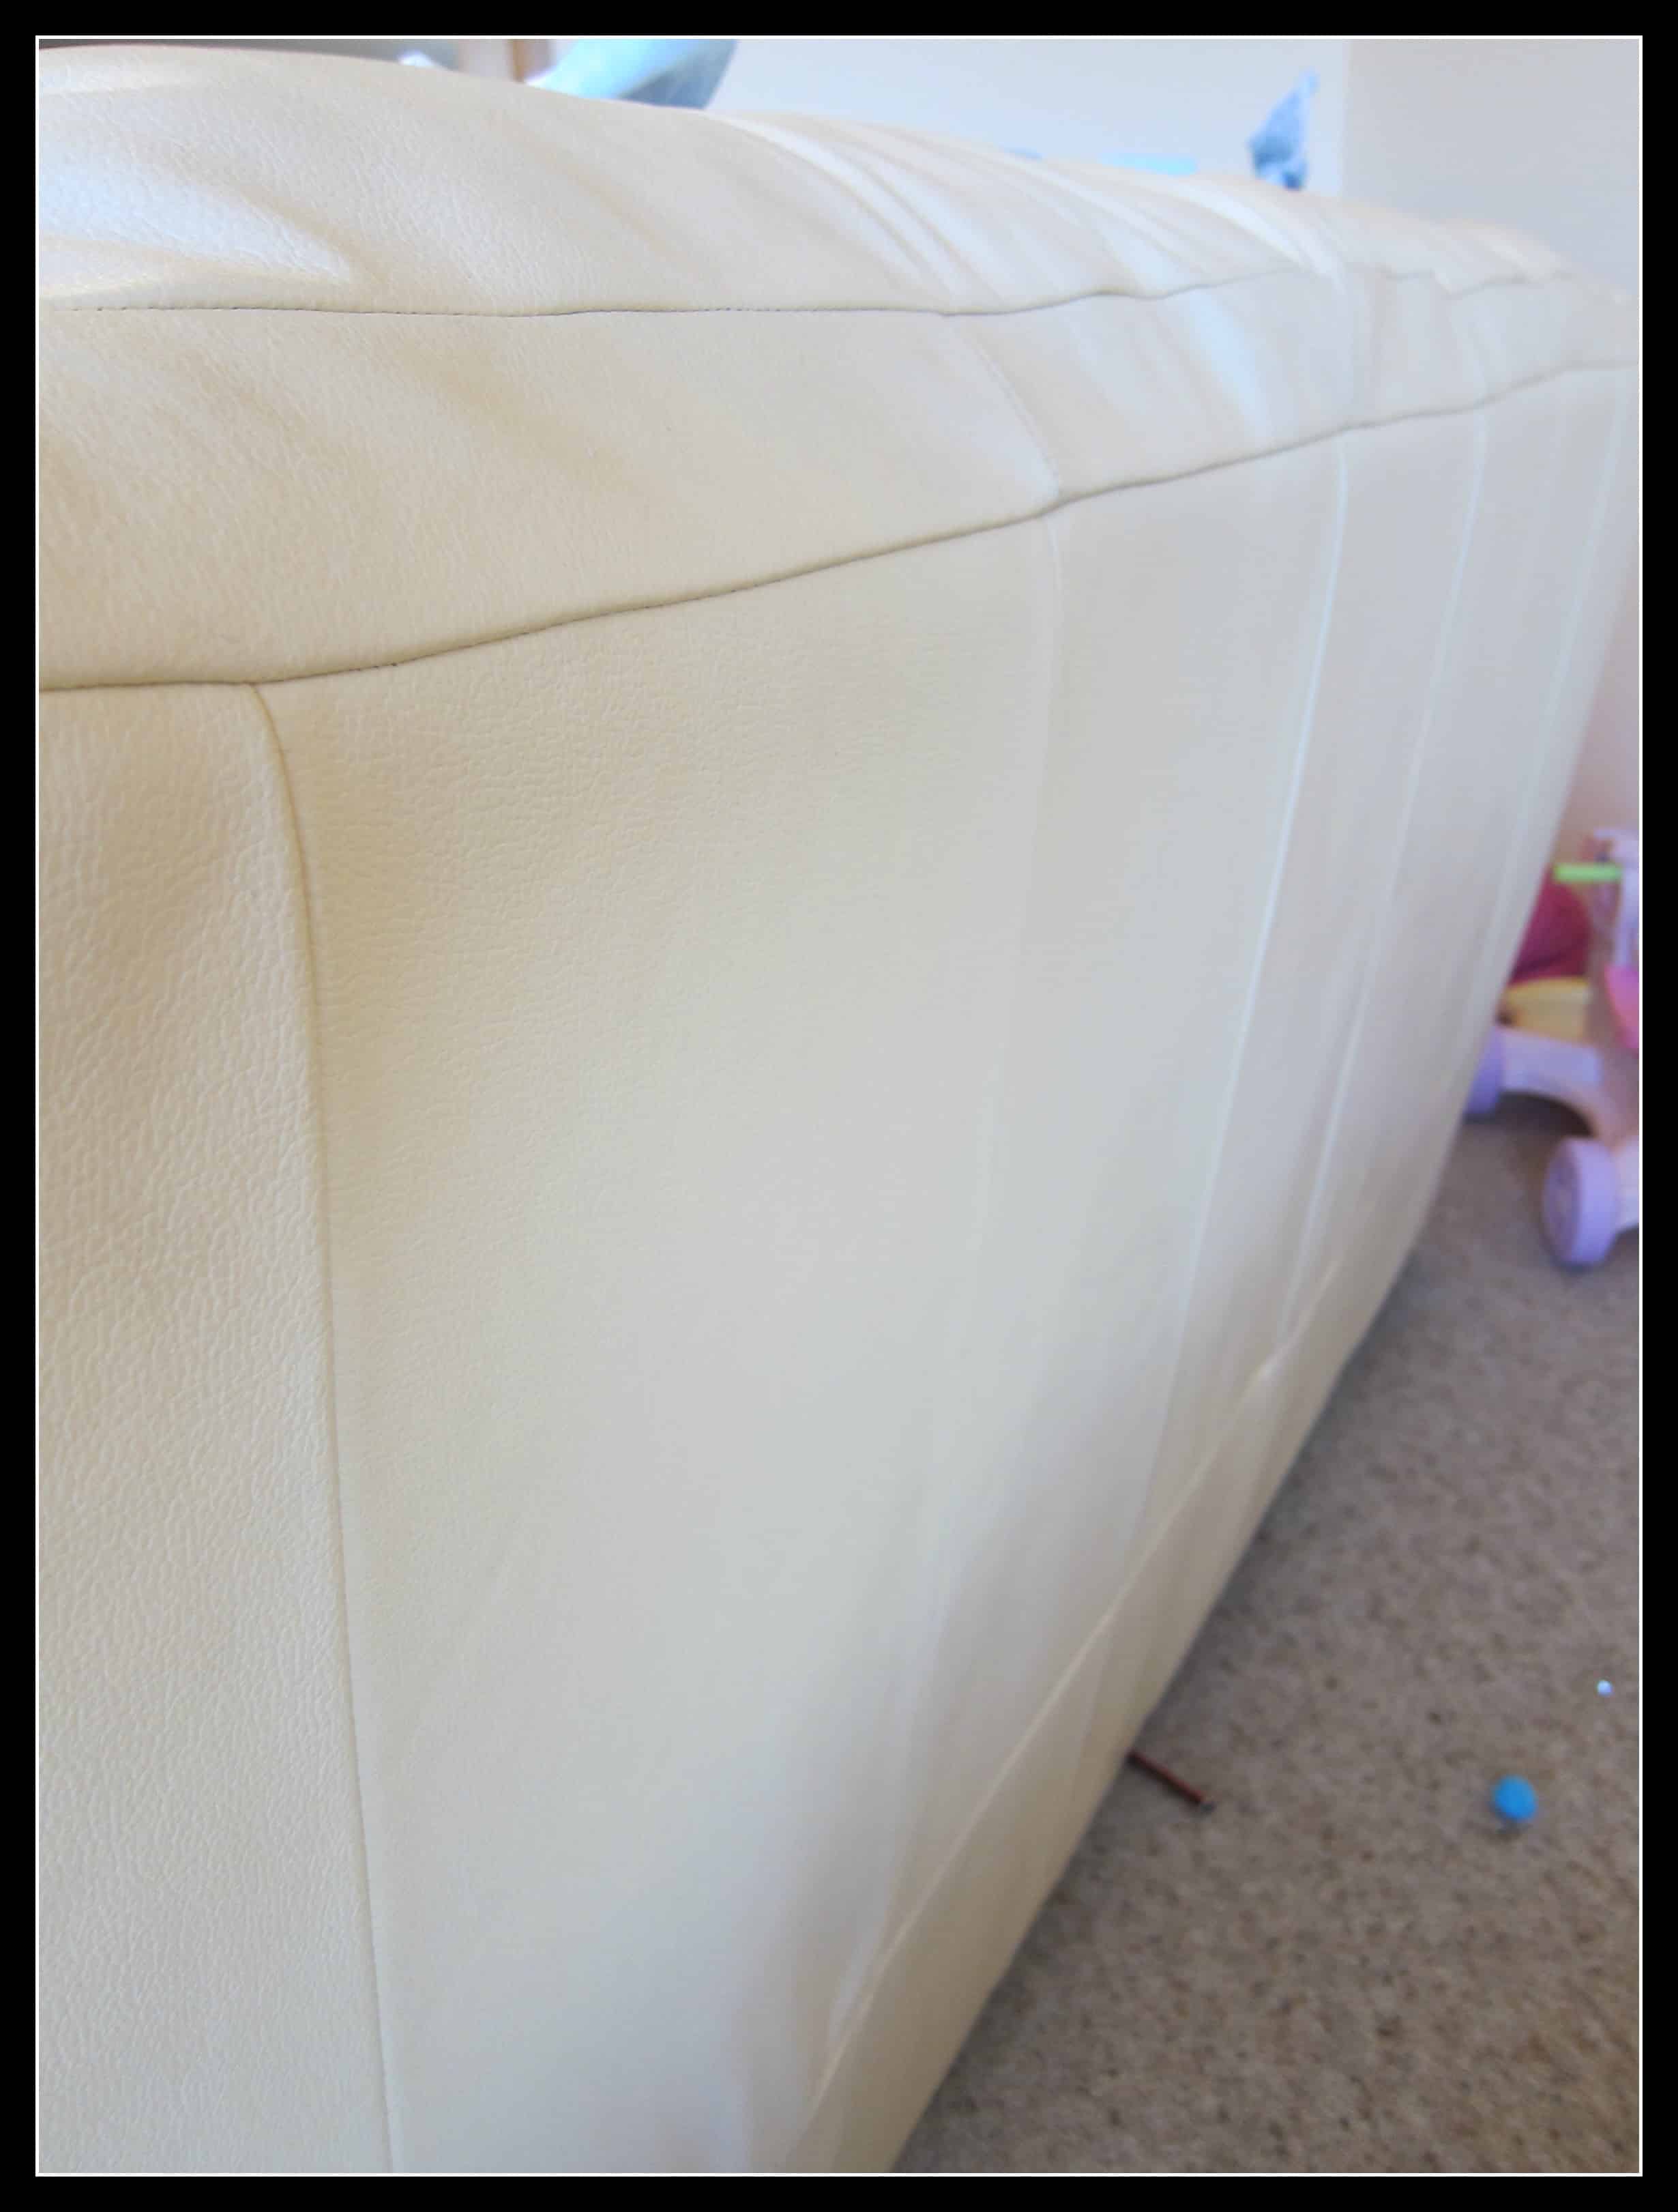
    and 200-odd comments later we had this…

    how to get pen off of leather

    After trying a host of things (eucalyptus oil, baby wipes, eye makeup remover…), guess what it was that took the Texta – also known as marker or pen for those outside Australia – off the leather lounge suite?

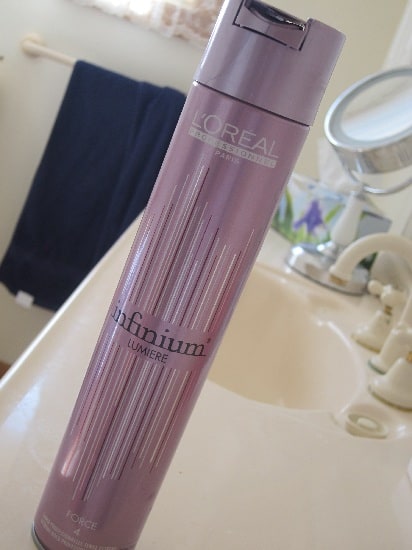
    For us, it was hairspray – and a fair bit of elbow grease. And not just any hairspray. It had to be decent hairspray. L’Oreal hairspray in fact, as the cheaper brand did nothing to get rid of the marker.

     L'Oreal hairspray

    Although, after half a bottle you wouldn’t want to have lit a match in the lounge room! Boy, oh boy!

    Here are some of the most popular answers from readers (you may want to try a small inconspicuous area first):

    • WD40
    • Hairspray
    • Chux Magic Eraser
    • Toothpaste
    • Jif
    • Windex
    • Enjo Fabric Glove
    • Baby wipes
    • Eucalyptus oil
    • Gumpton
    • Milk or hot milk
    • Bi carb made into a paste
    • Perfume

    Thanks for all the suggestions, including new kids, just pretending it’s not there, buying a new couch, colouring in the rest of the couch with a Texta and pushing the couch up against the wall…..

    And by the way, the culprit was a rather cheeky two year old who simply couldn’t resist drawing a Van Gough on that amazingly white canvas!

    HollySmile

    WANT THE HAIRSPRAY? CLICK THE IMAGE BELOW

    What have you used to remove pen, marker or Texta from leather and which one worked best?

    *NB: Some links in this post are affiliate links. I only recommend those products I use myself.

  • 6. #BloggingPrompts: Make the most of guest posts on your site

    6. #BloggingPrompts: Make the most of guest posts on your site

    Blogging Prompt Guest posts

    After last week’s blogging prompt on opening yourself up to guest posts, a few questions came in, including from Cie and Rhonda, about how to go about pitching to potential guest bloggers and then how to make it work.

    Here are my tips:

    • Pitch to bloggers where the opportunity is mutually beneficial. If you’re a business, for example, maybe look to another mum in business whose blog style is in a similar vein to you and has a similar sized social media following. It’s a great way to help each other out and build each other’s followings.
    • Some bloggers provide guidelines for guest posts, which can make it easier to manage. This can include things like ideal post length, ideal number of images, how many links you’re willing to offer them in the post and what format you like to receive the post in. This prevents any niggling problems down the track.
    • Let the blogger know when their post is going live in advance. Send them a link if you’re able. I would suggest once you’ve scheduled the post, to put the link into bit.ly and share that link with the guest blogger. That way you can both track how much traffic came to it and from where.
    • Once it’s live, make sure to share it on all your social media platforms. It’s good etiquette for the guest blogger to do the same, but many come into blogging unaware of this, so a gentle reminder in your blogger guidelines, and maybe within the context of an email, can help. As mentioned, this is about helping grow each other’s blogs or sites.
    • Likewise, with comments left on the post, it’s generally accepted that the guest blogger will respond – after all, it’s their story they’re sharing. However, you may need to give them a gentle prompt on this. You are welcome to add to the conversation as well, of course.

    You never know, but it may be the start of a relationship where you’re able to continually support each other’s endeavours with future social media shout outs, blog posts and business or blog support. It’s certainly opened up some wonderful relationships for me.

    Do you have any other suggestions to add to the above to make accepting guest posts run smoothly?

    FREE COURSE

    Click the image below to learn how to make money from blogging in this 7-day mini course

    Click Here to Start